Embark on a puzzling journey! The 2×2 Rubik’s Cube, with 3,674,140 positions, offers a delightful challenge. Beginner’s method PDFs are readily available online, simplifying the learning process.
What is a 2×2 Rubik’s Cube?
The 2×2 Rubik’s Cube, also known as the Pocket Cube, is the simplest form of the Rubik’s Cube family. Unlike its larger counterparts, it only features edge pieces – no corners! This streamlined design makes it an excellent entry point for beginners eager to learn the fundamentals of cube solving.
With just eight pieces to manipulate, it presents a manageable challenge. Despite its simplicity, mastering the 2×2 requires understanding algorithms and spatial reasoning. Numerous resources, including downloadable PDFs, guide newcomers through the solving process, step-by-step.
Why Solve a 2×2?
The 2×2 Rubik’s Cube offers a uniquely satisfying puzzle experience. Its smaller size makes it incredibly portable – perfect for on-the-go entertainment. Solving it boosts cognitive skills like problem-solving, spatial reasoning, and algorithmic thinking. It’s a fantastic mental workout!
Furthermore, the 2×2 serves as a gateway to more complex Rubik’s Cubes. Mastering this simpler version builds a solid foundation for tackling larger puzzles. Many free PDF guides are available, making learning accessible to everyone, regardless of experience.
Understanding the Cube’s Anatomy
The 2×2 cube differs from larger versions; it features only edges, lacking center and corner pieces. PDF guides highlight this key distinction for beginners.
Centers
Unlike the 3×3, the 2×2 Rubik’s Cube doesn’t have center pieces. This is a fundamental difference that simplifies the solving process. Because centers are absent, their colors don’t dictate face orientation.
PDF tutorials often emphasize this immediately, as it alters the solving strategy significantly. Beginners frequently search for center algorithms, but they are unnecessary for the 2×2. Understanding this core anatomical difference is crucial for mastering the cube. It streamlines the learning curve, focusing solely on edge manipulation.
Edges
The 2×2 cube consists entirely of edge pieces – eight in total; These pieces each have two colors and are the sole components you’ll manipulate during the solve. PDF guides dedicate significant attention to edge orientation and permutation, as these are the keys to success.
Mastering edge movements is paramount. Tutorials often break down solving into stages focused on correctly positioning and orienting these edges. Recognizing edge patterns and applying appropriate algorithms, detailed in many online resources, will lead to a solved cube.
No Corners!
Unlike the more complex 3×3 Rubik’s Cube, the 2×2 lacks corner pieces entirely. This fundamental difference simplifies the solving process considerably. PDF guides emphasize this distinction, focusing solely on edge manipulation techniques. Beginners often find this absence less daunting, allowing quicker progress.
The absence of corners means algorithms are streamlined, concentrating on edge permutations and orientations. Tutorials highlight this unique aspect, providing targeted strategies. Mastering the 2×2 is an excellent stepping stone before tackling larger, more intricate cube variations.

Notation for 2×2 Solving
Standard notation (R, L, U, F) is crucial! PDF guides detail these movements for efficient solving. Understanding these symbols unlocks algorithm comprehension and cube manipulation.
R (Right Face)
Decoding ‘R’ moves is fundamental. In 2×2 solving notation, ‘R’ signifies a clockwise rotation of the right face. Imagine holding the cube with the right side facing you; turning that face clockwise one quarter-turn constitutes an ‘R’ move.
PDF tutorials consistently emphasize this basic move. An ‘R” (R prime) denotes a counter-clockwise rotation of the same face. Mastering ‘R’ and ‘R” is essential as they form the building blocks of more complex algorithms. Many beginner guides dedicate significant space to visualizing and practicing these foundational rotations, ensuring a solid understanding before progressing.
L (Left Face)
Understanding ‘L’ is crucial for 2×2 mastery. The ‘L’ notation represents a clockwise rotation of the left face. Visualize the cube with the left side directly facing you; a quarter-turn clockwise on this face defines an ‘L’ move.
Numerous 2×2 solving PDFs highlight ‘L’ alongside ‘R’ as core movements. Conversely, ‘L” (L prime) signifies a counter-clockwise rotation of the left face. Consistent practice of ‘L’ and ‘L” is vital, as they are frequently incorporated into algorithms. Beginner resources stress the importance of comfortable execution of these basic rotations.
U (Up Face)
The ‘U’ move is fundamental to 2×2 solving. It denotes a clockwise rotation of the top (up) face. Imagine holding the cube with the top face directly above you; a quarter-turn clockwise constitutes a ‘U’ move. Many introductory 2×2 Rubik’s Cube PDFs begin by establishing this notation.
Conversely, ‘U” (U prime) represents a counter-clockwise rotation of the top face. Mastering ‘U’ and ‘U” is essential, as they appear extensively in algorithms. Consistent practice, guided by online resources and PDF tutorials, builds muscle memory for efficient execution.
F (Front Face)
The ‘F’ notation signifies a clockwise rotation of the front face. Visualize the cube with a designated front side facing you; a quarter-turn clockwise defines the ‘F’ move. Beginner-friendly 2×2 Rubik’s Cube PDFs consistently introduce this notation early in the learning process, emphasizing its importance.
Conversely, ‘F” (F prime) indicates a counter-clockwise rotation of the front face. Like ‘U’ moves, mastering both ‘F’ and ‘F” is crucial for executing algorithms effectively. Numerous online tutorials and downloadable PDFs reinforce this concept through repetitive practice and clear visual aids.

Beginner’s Method: Step-by-Step
Unlock the 2×2! A beginner’s method, detailed in many PDFs, breaks down solving into manageable steps: first layer, orientation, and permutation—a logical progression.
Step 1: Solving the First Layer
Initiate the solve! Begin by selecting a color and building the first layer, focusing on correctly positioning the edges. Many beginner-friendly PDFs illustrate this process visually, offering clear diagrams and step-by-step instructions. The initial goal is to create a solid, correctly colored face.
This foundational step establishes a base for subsequent layers. PDF guides often emphasize recognizing edge pieces and maneuvering them into their correct locations using simple algorithms. Practice makes perfect; mastering the first layer is crucial for building confidence and understanding the cube’s mechanics. Don’t rush, focus on accuracy!
Orienting the Edges
Focus on color alignment! Orienting edges means getting the colors on each edge piece to match their respective center pieces. Beginner PDFs detail algorithms specifically for this task, often involving simple rotations like R, U, L, and F. Visualize the desired outcome – each edge’s colors must correspond to the adjacent centers.
These guides frequently showcase diagrams illustrating the hand movements needed for each algorithm. Consistent practice is key to memorizing these sequences. Correct edge orientation is fundamental; it sets the stage for a successful first layer completion. Don’t be discouraged by initial struggles!
Step 2: Permuting the First Layer
Positioning is paramount! Permuting the first layer involves correctly positioning the already-oriented edges. Many beginner’s method PDFs provide algorithms to swap edge pieces without disrupting their orientation. These algorithms typically utilize sequences of R, U, L, and F moves, designed to cycle edges into their correct spots.
Visual aids within these guides are crucial for understanding the move sequences. Practice slowly at first, focusing on accuracy. Successfully permuting the first layer means all edges are both oriented and in their final, correct locations, forming a solid base for further solving steps.
Positioning the Edges Correctly
Achieving correct placement! PDF guides detail algorithms for swapping mispositioned edges on the first layer. These algorithms, often involving R, U, L, and F moves, cycle edges without altering their orientation. Identifying the correct algorithm depends on the relative positions of the edges needing adjustment.
Beginner tutorials emphasize recognizing patterns. Practice these algorithms slowly, visualizing the edge movements. Consistent practice, guided by a PDF, builds muscle memory and speeds up solving. Correct edge positioning completes the first layer, setting the stage for tackling the remaining layers with confidence.
Step 3: Orienting the Last Layer (OLL)
Final layer edge orientation! PDF resources showcase numerous OLL cases, each requiring a specific algorithm. These algorithms manipulate the top layer edges to achieve the correct color alignment, without disturbing the solved first layer. Recognizing the OLL case is crucial for applying the appropriate sequence.
Beginner methods often focus on learning a subset of OLL algorithms. Mastering these foundational cases significantly reduces solving time. Practice identifying cases quickly and executing the algorithms smoothly, referencing your PDF guide for clarity and accuracy. This step brings the cube closer to completion!
Recognizing OLL Cases
Pattern identification is key! PDF guides categorize OLL cases based on the arrangement of yellow edges on the top layer. Look for patterns – how many yellow stickers are facing up, and their relative positions. Common cases include all edges oriented, only one oriented, or edges needing complete flipping.
Visual aids within the PDF are invaluable. Diagrams clearly illustrate each case, simplifying recognition. Practice consistently, comparing your cube’s top layer to the provided images. Accurate identification is paramount; applying the wrong algorithm will disrupt progress. Develop a systematic approach to quickly assess the OLL situation.
Step 4: Permuting the Last Layer (PLL)
Finalize the solve with PLL! PDF tutorials detail PLL algorithms for swapping edge positions on the top layer. Identify the PLL case by observing how the edges need to be cycled or flipped. Common cases involve swapping adjacent edges, or rotating all edges in a specific direction.
PLL algorithms, often short and efficient, require precise execution. PDF guides provide clear notation and diagrams. Practice each algorithm until muscle memory develops. Correct PLL application ensures the cube is solved, completing the journey from scrambled to solved. Mastering PLL unlocks faster solve times!
Identifying PLL Cases
Recognizing PLL patterns is key! PDF guides categorize PLL cases based on edge orientation and position. Look for whether edges need swapping, rotating, or flipping. Common cases include ‘U-perms’ (rotating all edges) and ‘H-perms’ (swapping pairs).
Carefully analyze the top layer edges. Are any edges already in their correct spots? Does the entire layer need a rotation? PDF resources often use visual diagrams to aid identification. Accurate case recognition is crucial for applying the correct PLL algorithm, leading to a successful solve.
Common 2×2 Algorithms
Mastering algorithms unlocks speed! PDF tutorials detail essential algorithms for OLL and PLL. Practice these sequences to efficiently orient and permute the cube’s edges.
Algorithm for Orienting Last Layer Edges
Orienting the final layer edges is crucial. Many beginner PDF guides present algorithms like R U R’ U R U2 R’ to flip edges. These sequences, when applied correctly, systematically re-orient the last layer without disturbing solved portions. Understanding when to apply these algorithms, based on edge orientation patterns, is key.
Practice recognizing the different cases – zero, two, or four edges needing orientation. Consistent practice with these algorithms, found in numerous online resources and downloadable PDFs, builds muscle memory and speeds up solving times. Don’t be afraid to slow down initially to ensure accuracy!
Algorithm for Permuting Last Layer Edges
Permuting edges involves swapping their positions. Beginner’s method PDFs often detail algorithms like R2 U R U R’ U’ R’ U’ R’ U R’ for cycling edges. These sequences rearrange the last layer edges into their correct locations, completing the solve. Identifying the specific edge permutation case is vital for algorithm selection.
Resources emphasize recognizing patterns – adjacent swap, diagonal swap, or a full cycle. Mastering these algorithms, readily available in downloadable guides, requires practice. Consistent application, combined with understanding the underlying logic, dramatically improves solving efficiency and speed.

Advanced Techniques
Beyond the beginner’s method, F2L and COLL/EPLL drastically reduce solve times. PDF guides detail these techniques, enabling faster, more efficient 2×2 solving.
F2L (First Two Layers)
F2L is a powerful technique that solves the first two layers simultaneously, significantly reducing move count. Unlike beginner methods focusing on layers individually, F2L pairs edges and corners, inserting them correctly in one step.
PDF guides dedicated to 2×2 solving often include detailed F2L algorithms and case studies. Mastering F2L requires recognizing different scenarios and applying the appropriate algorithm efficiently. It’s a substantial leap from the beginner’s method, demanding practice and pattern recognition.
Successfully implementing F2L dramatically improves solve times, paving the way for faster and more fluid solving experiences. Many resources offer visual aids alongside the algorithms, enhancing comprehension.
COLL (Corners of Last Layer) & EPLL (Edges of Permuted Last Layer)
COLL and EPLL represent advanced 2×2 solving stages, building upon F2L. COLL orients the last layer corners, preparing for the final edge permutation. EPLL then permutes those edges to complete the solve. These techniques demand memorization of numerous algorithms, often presented in comprehensive PDF guides.
PDF resources categorize COLL and EPLL cases, providing visual representations and algorithmic solutions. Mastering these steps requires dedicated practice and a strong understanding of cube rotations. They significantly reduce solve times for experienced cubers.
Efficient COLL/EPLL execution transforms a solved cube from a near-complete state into a fully solved one with minimal moves.

Resources for Learning
Numerous online tools aid learning! Explore interactive 2×2 solvers and detailed PDF guides. YouTube tutorials visually demonstrate solving techniques, accelerating your progress.
Online 2×2 Solvers
Interactive solvers offer a dynamic learning experience. These tools allow you to input the current state of your cube and receive step-by-step solutions. While not a substitute for understanding the solving process, they’re invaluable for checking your work or overcoming particularly tricky scenarios.
Because of the cube’s relatively small number of possible combinations (3,674,140), solvers don’t rely on complex algorithms for every state. Instead, they often employ pre-calculated solutions or efficient search algorithms. Many solvers also provide visual representations of the moves, enhancing comprehension. Finding a good solver can complement PDF guides and video tutorials, solidifying your understanding.
PDF Guides and Tutorials
Comprehensive PDF guides provide structured learning paths. Many freely available resources detail the beginner’s method, breaking down the solving process into manageable steps. These guides often include clear diagrams illustrating each algorithm and explaining the underlying logic. They’re perfect for offline study and referencing during solves.
Searching for “how to solve a Rubik’s Cube 2×2 PDF” yields numerous options. Look for guides that emphasize understanding why algorithms work, not just memorizing them. Combining a PDF guide with online video tutorials creates a powerful learning synergy, reinforcing concepts and improving retention.
YouTube Tutorials
Visual learners thrive with YouTube tutorials! Numerous channels offer step-by-step 2×2 solving guides, complementing PDF resources. These videos demonstrate algorithms in real-time, making it easier to grasp the hand movements and cube rotations. Search for “2×2 Rubik’s Cube beginner tutorial” to find suitable content.
Many tutorials mirror the methods found in PDF guides, providing a multi-faceted learning experience. Look for channels that explain the concepts clearly and offer practice scrambles. Combining visual instruction with downloadable PDFs allows for a more thorough understanding and faster progress in mastering the 2×2.

Troubleshooting Common Problems
Stuck? Refer to your 2×2 PDF guide for algorithm checks. Incorrect layer orientation or jammed edges are common; review steps carefully for solutions.
Stuck Edges
Frustrated with immobile edges? Your 2×2 Rubik’s Cube PDF guide is your first resource! Often, seemingly stuck edges aren’t truly locked; incorrect preceding steps cause the issue. Double-check your algorithm execution, ensuring precise movements.
Review the first layer solving section, specifically edge orientation and positioning. A common mistake involves misaligning edges before proceeding. If edges remain stubborn, consult diagrams within the PDF to visually confirm correct alignment.
Avoid forceful manipulation, as this can damage the cube. Gentle, deliberate turns, guided by the PDF’s instructions, are key to resolving stuck edge scenarios. Patience and methodical review are essential!
Incorrect Layer Orientation
Facing a disoriented cube? Your 2×2 Rubik’s Cube PDF guide provides crucial orientation algorithms. Incorrect layer orientation typically arises from skipping steps or misapplying OLL (Orient Last Layer) or PLL (Permute Last Layer) algorithms.
Carefully revisit the OLL section of your PDF, identifying the correct case matching your cube’s current state. Ensure you’re executing the algorithm precisely as depicted, paying attention to face rotations.
If the issue persists, double-check the first layer’s completion. A flawed foundation impacts subsequent layers. The PDF’s diagrams are invaluable for visual confirmation. Remember, methodical review and accurate execution are paramount!
Speedcubing the 2×2
Elevate your solving! Advanced PDFs detail look-ahead techniques and finger tricks for faster times. Practice efficient algorithms to boost your 2×2 speed.
Look-Ahead Techniques
Mastering predictive solving is key to speedcubing. Look-ahead involves anticipating the next steps during the execution of current algorithms. Many 2×2 PDF guides emphasize recognizing patterns and visualizing cube states several moves in advance. This minimizes pauses between steps.
Begin by focusing on identifying the next edge piece to orient or permute while performing the current algorithm; Gradually increase the number of moves you look ahead. Practice with slow, deliberate movements initially, then build speed. Effective look-ahead dramatically reduces solve times, transforming your 2×2 experience.
Finger Tricks
Efficient finger movements are crucial for fast solves. Finger tricks involve using specific finger combinations to execute turns quickly and smoothly. Many 2×2 tutorial PDFs demonstrate these techniques, focusing on minimizing hand movements and maximizing turn speed. Mastering these will significantly improve your times.
Common tricks include using your index and middle fingers for R and L turns, and your thumbs for U turns. Practice these motions repeatedly until they become muscle memory. Smooth, fluid execution is more important than raw speed initially. Consistent practice builds dexterity and efficiency.
2×2 Cube Variations
Explore diverse cube designs! Magnetic 2x2s offer smoother turning, while stickerless versions eliminate peeling issues. PDF guides cover solving all variations effectively.
Magnetic 2×2 Cubes
Experience enhanced control! Magnetic 2×2 cubes utilize magnets within their construction, creating a stronger connection between pieces. This results in a significantly smoother and more stable turning experience, appealing to both beginners and speedcubers alike. The magnets aid in alignment, reducing lockups and improving overall solve times.
While the solving principles remain identical to standard 2×2 cubes – and readily available in PDF guides – the tactile feedback and precision offered by magnetic cubes can accelerate learning and enhance enjoyment. Many solvers find the magnetic feel more intuitive, making it easier to execute algorithms accurately. They are a popular upgrade for those serious about improving their 2×2 solving skills.
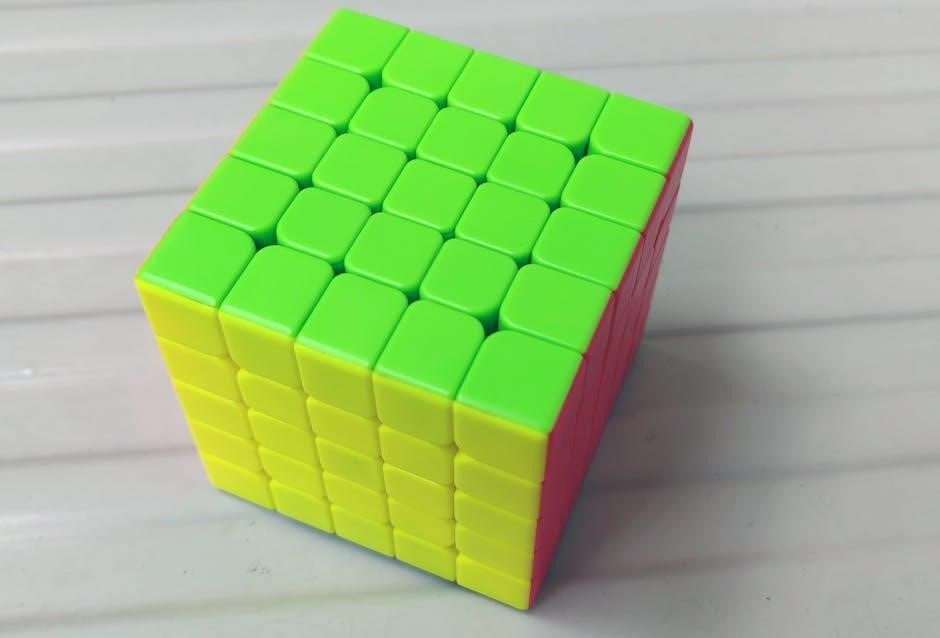
Stickerless 2×2 Cubes
Enjoy durability and aesthetics! Stickerless 2×2 cubes feature molded plastic pieces, eliminating the need for adhesive stickers. This prevents sticker peeling or fading, ensuring a long-lasting and visually appealing cube. The textured plastic provides a secure grip, aiding in faster and more precise turns.
The solving methods remain consistent with traditional 2×2 cubes, easily learned through available PDF tutorials. Many solvers prefer stickerless cubes for their clean appearance and enhanced durability. They are a great option for beginners and experienced cubers seeking a reliable and visually pleasing puzzle.

The Mathematics of the 2×2 Cube
Explore the puzzle’s core! The 2×2 cube utilizes permutations and combinations, with 3,674,140 possible states. Group theory explains its solvable structure, detailed in learning PDFs.
Permutations and Combinations
Delve into the mathematical foundation! The 2×2 Rubik’s Cube’s complexity arises from permutations – arrangements of its pieces. With only edge pieces, calculations differ from larger cubes; There are 3,674,140 possible configurations, determined by combining edge permutations and orientations. Understanding these combinations is crucial for solving. Beginner’s method PDFs often simplify this, focusing on algorithms rather than exhaustive calculations. These resources guide you through specific sequences, effectively navigating the permutation space without needing to compute every possibility. Learning these patterns unlocks efficient solving techniques, making the puzzle accessible even without a deep mathematical background. PDFs provide a practical approach to mastering this fascinating mathematical puzzle.
Group Theory and Rubik’s Cubes
Explore the abstract algebra! Rubik’s Cubes, including the 2×2, are deeply connected to group theory – a branch of mathematics studying symmetry. Each move forms an element within a group, and solving involves finding a sequence of moves (a subgroup) to return the cube to its solved state. Beginner’s method PDFs don’t explicitly teach group theory, but implicitly utilize its principles. Algorithms are essentially pre-defined group operations. Understanding this connection provides a deeper appreciation for the cube’s structure and the efficiency of solving methods. It reveals why certain moves work and others don’t, offering a more profound understanding beyond rote memorization.

History of the 2×2 Cube
A compact classic! Originating as a smaller variant of Rubik’s Cube, it gained popularity alongside solving guides. Early PDFs aided enthusiasts in mastering its mechanics.
Origins and Development
The 2×2’s story begins with Rubik’s Cube itself! Initially conceived as a teaching tool, the larger 3×3 sparked a global puzzle craze. The 2×2, a simplified version, quickly followed, offering a more accessible entry point for newcomers. Early solving methods relied on memorization and pattern recognition, documented in nascent online communities and, crucially, emerging PDF guides;
These initial PDFs were vital, providing step-by-step instructions and algorithms for beginners. As the puzzle’s popularity grew, so did the sophistication of these resources, evolving from basic tutorials to comprehensive solution manuals. The development mirrored the broader evolution of Rubik’s Cube solving, with faster methods continually being discovered and shared.
Evolution of Solving Methods
Early 2×2 solving, detailed in initial PDFs, focused on layer-by-layer approaches. These guides broke down the puzzle into manageable steps, teaching algorithms for orienting and permuting edges. As solvers gained experience, more efficient methods emerged, documented in increasingly advanced PDF tutorials. The beginner’s method, still prevalent, gradually gave way to techniques like F2L (First Two Layers).
PDF resources adapted, incorporating these advancements. They transitioned from purely instructional to including case recognition guides and algorithm lists for OLL (Orient Last Layer) and PLL (Permute Last Layer). This evolution mirrored the broader speedcubing community’s pursuit of faster solve times, all fueled by shared knowledge within downloadable PDFs.